|
|
|
|
|
|
|
|

|
|

|
|

|
|

|
|
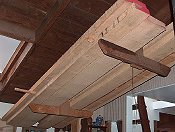
Each piece of the rough 8/4 lumber was hand picked
for figure and grain. It is then placed in a heated room for
2-3 weeks to stabilize before the machining process
begins
|
|
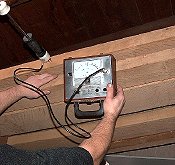
The moisture is monitored and brought to an average
of 9% to 10% to be most stable in the region of Northern
California where it will "live".
|
|
The pieces are "roughed out" and allowed a few days
to settle down and let any tension resolve
|
|
The bottom horizontal rail is 11" wide and best made
of 2 pcs of 6" vertical grain ...... so that true vertical
can be used.... it will cure for 4 days in clamps
|
|
|
|
Click
on
|
ANY
|
Image
to Enlarge
|
|
|
|
|
|
|
|
|
|

|
|

|
|

|
|

|
|
When you enlarge this pictures you will see that the
annual growth rings are so close together, that it is hard
to define. This wood is amazing
|
|
All of the lumber is bought rough and then jointed
to flat on face and the surfaced to thickness.
|
|
Then the surfaced pieces are jointed on edge to be
made straight and square
|
|
The mid vertical mullions are all cut at one time so
as to be the exact same length
|
|
|
|
|
|
|
|

|
|

|
|

|
|

|
|
The mullions are then fitted to length by jointing
3/32" off the bottom rail
|
|
I then choose the horizontal mullions and label them
for their place in the door
|
|
Each ...... and I mean EACH.... mullion is hand fit
to its' place in the grand design.
|
|
They will now be machined on the sides and the door
will be ready to be glued up !!
|
|
|
|
|
|
|
|
|
|
|
Click
on
|
ANY
|
Image
to Enlarge
|
|
|

|
|

|
|

|
|

|
|
Each piece is pre-glued and then the assembly
starts. This door is built from the center out
|
|
Here it is just assembled. All of the excess glue is
wiped off
|
|
And then we actually wash the residual ...... and
clean the corners with a toothbrush
|
|
The door cures for at least 72 hrs before it can be
removed from the clamps.
|
|
|
|
|
|
|
|

|
|

|
|

|
|

|
|
Check out the medullary rays that appear in vertical
grain White oak
|
|
Here is a view of the inside of the door ...... just
out of clamps.
|
|
Here is the quartersawn blanks for the long
panels
|
|
and we dimensional sand them to the rough
thickness
|
|
|
|
|
|
|
|

|
|

|
|

|
|

|
|
Then they are shaped and then sanded by machine and
then by hand
|
|
Every molded edge is hand sanded and then the faces
are sanded ..... all of this before I trim the door, which
is made 1/2" oversize.
|
|
Here is a view of the solid 1-1/2" white oak jambs
before kerfing for the weather-stripping or sanding
|
|
The hinges are mortised and the door is
"signed"
|
|
|
|
|
|
|
|

|
|

|
|

|
|

|
|
The hinge is fitted
|
|
At the top, of a heavy door, I place the hinges
closer together ...... since most of the weight is carried
by the top hinges
|
|
Here the door is ready for oil
|
|
Here is the first (of four) coat of varnish oil ....
just look at the grain !!
|
|
|
|
|
|
|
|
|

|
|

|
|

|
|

|
|
Each coat has to cure for 3 days before
re-coating
|
|
The panels are oiled separately
(4x's)
This way the panels and doors are sealed for the inside out
.... that's the way it should be !!
|
|
Each panel is solid 1-3/8" White Oak and raised on
both sides
|
|
Here the door jamb receives its' first coat of
oil
|
|
|
|
|
|
|
|

|
|

|
|

|
|

|
|
Here are a few if the beveled and thermal glass
units
|
|
Here is everything fitted in the door and ready for
stops to be hand cut
|
|
I make the stops out of the same wood that I used in
the doors .... that's why the wood matches .
|
|
Here is a close-up of the panels and stops
|
|
|
|
|
|
|
|

|
|

|
|

|
|

|
|
Because the door weighs 150 lbs I use 2 - 4" hinges
at the to 1/4th of the door. All of the weight is trying to
pull out the hinge
|
|
I use 4 hinges to hold the door. They are solid
brass with a lifetime finish. The door weighs 215 lbs in the
jamb
|
|
Here is a close-up of the jamb with weather
stripping. I provide the jamb long so that it can be trimmed
on sight for the threshold
|
|
Here are the 2 load bearing hinges at the top of the
door and jamb
|
|
|
|
|
|
|
|
|
|
|
|
|
|
|
|


