|
|

|
|

|
|

|
|
All the final calculations are double checked
....... and the process begins
|
|
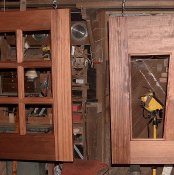
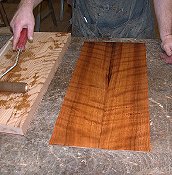
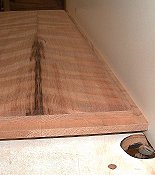
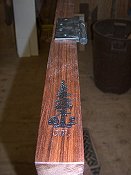
Here is one of the boards I pulled for these
doors
|
|
This tree was Chopped
Down by an ax over 85 years ago
|
|
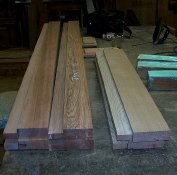
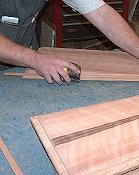
Here are all the rough lumber boards that will make
the two doors
|
|
|
|
|
|
|
|

|
|

|
|

|
|

|
|
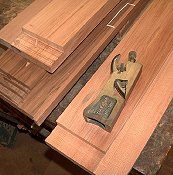
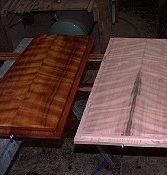
Here are some end cuts that I scanned to show the
quality of Redwood used in these doors
|
|
One piece had over 50 growth ring to 1 inch of
growth
|
|
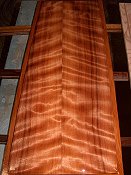
Here are all the rough cut planks that will be
used
|
|
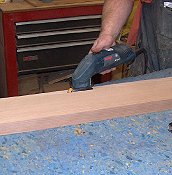
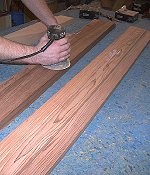
Each board is jointed flat and straight
|
|
|
|
|
|
|
|

|
|

|
|

|
|

|
|
......... The plane to the thickness of 1-3/$ of an
inch
|
|
then the finished boards are ripped to
width
|
|
......... and then cut to length
|
|
Here are all of the pieces ....... finished cut
...... ready for mortising and machining
|
|
|
|
|
|
|
|

|
|

|
|

|
|

|
|
I then start to fit the pieces ....... each piece is
cut to fit and just not "batched"
|
|
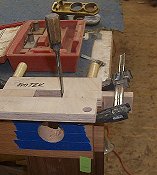
Here I shape the ends with a cope cut on the
shaper
|
|
.... and then the "sticking" is shaped
|
|
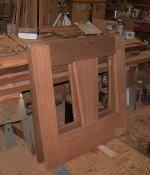
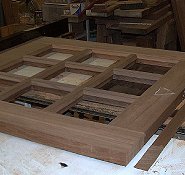
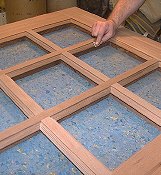
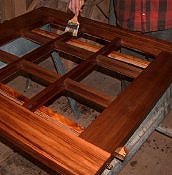
The pieces are "dry" fit and labeled for
glue-up
|
|
|
|
|
|
|
|

|
|

|
|

|
|

|
|
The pieces are pre-glued and the coated with glue
again
|
|
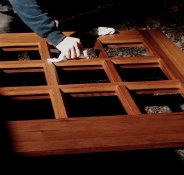
All excess glue is wiped off
|
|
and all corners are cleaned with a
toothbrush
|
|
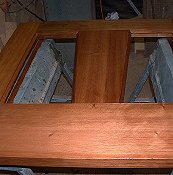
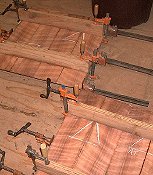
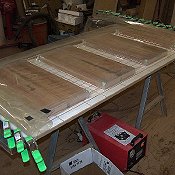
Here are the two upper halves ....... and they will
remain in clamps for 72 hrs.
|
|
|
|
|
|
|
|

|
|

|
|

|
|

|
|
Here they rest .... out of clamps
|
|
The beveled molded edge is then hand sanded
|
|
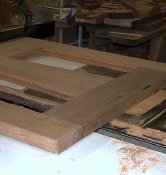
Here the lower parts .... dry fitted
|
|
... and then glued up
|
|
|
|
|
|
|
|

|
|

|
|
|
|
|
|
... here the bottom half is clamped in all
directions
|
|
Here they will cure for the next 3 days
|
|
Here are the lower halves ...... out of
clamps
|
|
since I make the slightly oversize ....... I then
cut them to actual size
|
|
|
|
|
|
|
|
|
|
|
|
|
|
|
|
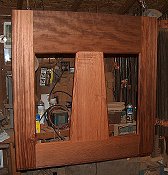
Here I am trimming the upper half
|
|
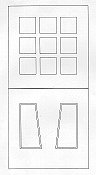
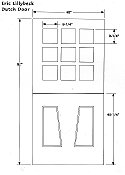
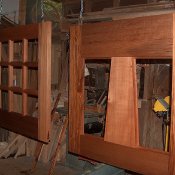
Here are the parts for the two Dutch doors
|
|
The the hand sanding begins on all the molded
edges
|
|
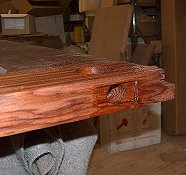
The hand work .... includes the hand finishing of
the Dutch half-lap
|
|
|
|
|
|
|
|
|
|

|
|
|
|
|
|
They are then finished and prepped for oil
|
|
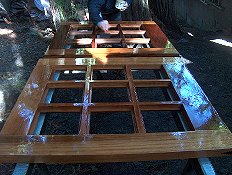
Here we start the 1st of 4 coats of
varnish-oil
|
|
......... a finished half
|
|
here it will cure for at least 3 days before the
next coat
|
|
|
|
|
|
|
|
|
|
|
|

|
|
|
|
the final hand sanding on the upper halves
|
|
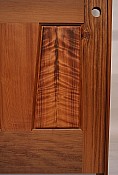
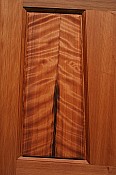
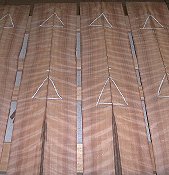
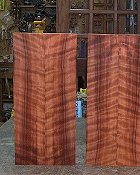
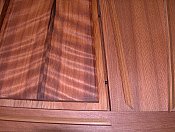
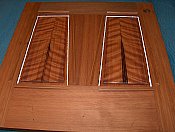
Here is the curly Redwood for the panels
|
|
It is old growth ...... and each piece is a book
match ........ and all ..... are bookmatched to each
other
|
|
Here they are glues up and left to rest for 3
days
|
|
|
|
|
|
|
|
|
|
|
|
|
|
|
|
Applying one of four coats for my Varnish-Oil
to the upper half of the
Dutch doors
|
|
wiping off the excess oil
|
|
they will then cure for 3-4 days before the next
oiling !!
|
|
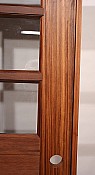
............ another view ......... such beautiful
wood
|
|
|
|
|
|
|
|
|
|
|
|
|
|
|
|
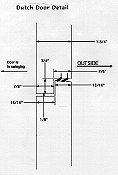
here I rabbit the 1-1/2" jambs and then notch the
head of the jamb for the top piece
|
|
The solid Redwood jambs
|
|
here we sand the rabbits ...... and then I'll notch
them for weatherstripping
|
|
all of the stops are
SOAKED
........ 4 times in our oil
......... our doors are sealed from The Inside
Out.
|
|
|
|
|
|
|
|

|
|
|
|
|
|
|
|
Here are some Mahogany and Redwood stops curing
between soakings !!
|
|
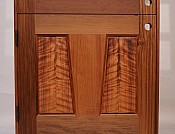
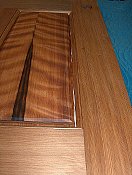
We are using figured Curly bookmatched Redwood for
the panels
|
|
they are resawn ..... bookmatched ...... and then
laminated to solid Redwood panels stock ......... here is my
vacuum press where the panels will remain under pressure for
72 hrs
|
|
Here are the panel "blanks" fresh out of the
press
|
|
|
|
|
|
|
|
|
|
|
|
|
|
|
|
Here the panels are being machined
|
|
... then they are machine and hand sanded
|
|
Here the receive their first (of four) coats of
varnish oil ...... here you see before and after
|
|
a panel with oil ...... electric
|
|
|
|
|
|
|
|
|
|
|
|
|
|
|
|
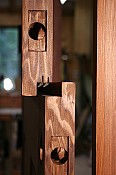
Here the doors are mortised for hinges and then
"signed"
|
|
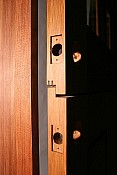
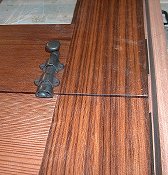
Here is the placement of the Dutch slide
hardware
|
|
Here I am boring for the knob set
|
|
... and here I'm squaring up the strike plate
mortise
|
|
|
|
|
|
|
|
|
|

|
|
|
|
|
|
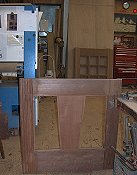
Here the jambs are being sanded before
oiling
|
|
The panels cure for 3 days between coats of varnish
oil
|
|
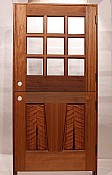
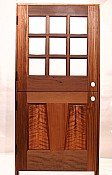
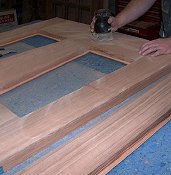
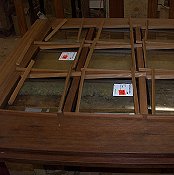
Here is the set of Dutch Doors with their 4 coat of
varnish oil
|
|
After the doors are bored for the lock sets ..... I
oil the "cut" three times .... that's the right way
!!
|
|
|
|
|
|
|
|
|
|
|
|
|
|
|
|
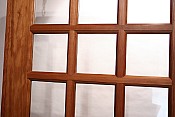
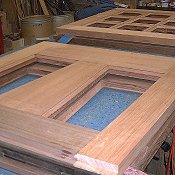
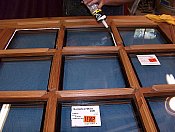
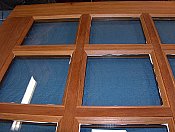
The insulated-tempered units are set in place and
the material for the stops is cut oversize and then
individually mitered
|
|
The glass is set on rubber blocks and caulked with a
50 year siliconized caulk which turns clear upon
curing
|
|
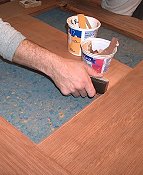
The "squeeze out" is cleaned up and the stops are
set with stainless steel fasteners
|
|
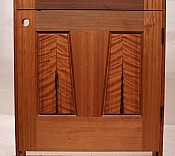
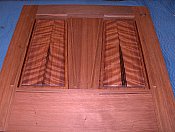
The bookmatched curly Redwood panels actually
"float" in their frame
|
|
|
|
|
|
|
|
|
|
|
|
|
|
|
|
They are suspended with neoprene spacers which allow
them to expand and contract with the weather
|
|
The panels are then caulked with a 50 year
siliconized caulk which turns clear upon curing
|
|
The "squeeze out" is cleaned up and the stops are
attached with stainless steel fasteners
|
|
|
|
|
|
|
|
|
|
|